Showing posts with label display ideas. Show all posts

Sunday, 8 September 2019

Grade 4 PYP Classroom Reveal

I have survived! Just about! I always forget just how much energy goes into the first week of school. Anyway, I managed to get a few snaps to show you around our grade 4 PYP classroom. Here's the first board. The students wrote their yearly goals on the popcorn pieces and wrote the Learner Profile attribute they related to. Also, how cute are the dog pegs we have in our school corridors?
 
Here's the view from the back of the room. I kept my cacti on the teacher board (They make me happy!). See how I crafted them here. I made the clock labels last year with the free digital papers from Jena Hudson at Sew Much Music.


I've displayed the PYP key concepts on the bottom of the board. I got these fantastic keys for free from Ms. Murdoch. When the students create initial questions at the start of a unit of inquiry, we have a discussion to categorise them according to the key concepts and stick them on post-it notes above the laminated keys. I have also attached my remote controls to the side of the board using adhesive velcro squares. I can guarantee I'd lose them otherwise!


I kept more or less the same calendar / self-assessment / Student of the Week display as last year. I'm still in love with this grey and mint calendar. The way I did "Student of the Week" worked very well last year. I choose a student on Monday to be our Student of the Week. The other students are encouraged to note instances where they demonstrate attributes of the Learner Profile. They can add this to the sheet. The sheet will be given to the student at the end of the week. As you can see, this sheet is put on with little pegs so it's easy to change weekly. Also on this display you'll see some reflection posters based on Marzano's Levels of Understanding. I have similar ones in my TPT store but I edited these so they fit with the colour-scheme on this board.


This is going to be built up to be an international corner. Here is where we record the greeting we use for the register (we choose a new language each Monday). The students are already excited to use this Rugby World Cup wall chart to mark in their team's scores. I look forward to seeing how they get on with this target board (rugby-themed of course! It's part of my Rugby World Cup resource pack).


Here you can see our Class Agreements already up. The students chose to do them on a giant sheet of paper! And the "Magic Maths Words" display is still going strong. The students will add useful words to it as the year goes on to help with problem-solving e.g. multiplication words could be "multiply," "groups of," "by," "double," "times," etc. I got the title banner from Sparkleboxthe symbols from Fun for Learning and the adhesive googly eyes from Flying Tiger. Above those are these multiple posters (from Twinkl) which proved to be a very useful aid for some students last year. It's also very handy that I can cover them up with a blind if I need to hide that visual aid! They're free, even if you don't have a paid Twinkl membership.




In line with the enhanced PYP, I've updated the header on my ex-transdisciplinary skills posters so it now reads "Approaches to Learning." As you can see, the Learner Profile header is up on the door. On the second day, the students worked collaboratively on Google Sheets to create their own posters for each of the Learner Profile attributes. I then cut out a small, laminated photograph of each child. They move their own/ somebody else's photograph to the Learner Profile attribute they catch them displaying. We did this last year and it worked really well.

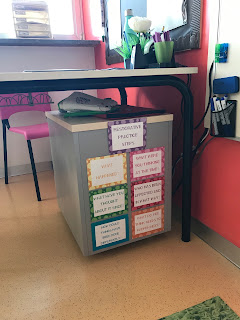
These restorative practice steps posters are a new purchase from @teacher_elaine_ (formerly Diary of an NQT)'s mash.ie store. I placed them on the back of my locker so they are close to use when we have circle time.


Here's the back of our classroom. The Italian board was done by the Italian teacher and the other is a central unit of inquiry board. I've used resources from by Unit of Inquiry Bulletin Board Display Kit to display the important information. For now, I will continue to use this polkadot behaviour management clip chart that I got for free from Under The Alphabet Tree (on the tall bulletin board). It has worked very well for my classes in the past and it is used school-wide. Having read quite a few articles online this weekend about the effect it can have on children, I'm going to reflect on if I want to continue with this tool. I try to keep it as positive as possible and adjust expectations according to individual students' needs. If the clip chart doesn't work for a student, a separate individual behaviour management system can be put in place so they don't feel that their peg is always at a lower point on the chart. I made a cute little "Are we being principled?" sign for above it. That sign has traveled with me through many rooms and grades!


If you look closely in the last big picture, you can see this inquiry cycle poster in the middle of the big board. I got the circle graphic from Mr. PYP and I created the header using Twinkl Create. I've left the rest of the board blank so that we can add to it as we go through the stages of the inquiry cycle together, documenting along the way. Stand by for future posts on that!


And I love this little action board in the reading/reflection corner. I thought it would be nice here as the students can spend some time pondering on their ideas. I got these action posters from Susan Powers. If you are a PYP teacher and you don't know her blog PYP Teaching Tools, GET ON IT!!! She has amazing ideas and resources and you will be full of inspiration. She has also started a series of videos which are great for teachers who are new to the PYP to get their head around inquiry-based learning in PYP schools. I also picked up these action cycle posters from The Classroom Contessa. 


Up high you can see another new purchase, these Developing IB PYP Student-Led Action posters, again from the magnificent Susan Powers. I can't wait to use her planning templates so students can plan their action and reflect on it. I've left two boards blank for the students to create displays as they learn.


And last but not least, our Burning Questions board. Again, I've put the key concepts around it (I used the little ones from my UOI display kit mentioned above). We did this last year and it really helped the students to understand the key concepts. 

Thanks for taking the time to virtually visit our learning space! 

Monday, 22 July 2019

Student-Created Displays in Our PYP Classroom

I admit it. I really have to consciously work on this. I love to create an inviting classroom but I definitely need to be reflective about how much input the students have in the set-up of the classroom and of creating displays. I just wanted to share some ways in which my students designed how they were going to share their learning this year. 

I was very lucky last year to have a very small class of just 13 students. This made group decision-making a little easier and students were often able to work on the same giant sheet of paper at the same time. In our school we have our displays on backed and bordered boards. I prepared big sheets of paper about the size of the display board for the students to design. 

For this one, the students just went at it and drew their cave painting where they liked. They also wrote what it meant on flaps of paper so that other students could check if the message was communicated correctly.


This next one was for personal inquiries (some students chose to work independently, some collaboratively). They spoke together before even starting their research and decided roughly where their section of the display would be. They voted on how the header would look, where it would be positioned and who would write/draw it. Then, as they researched, they wrote directly onto the giant sheet. 


And finally, I had used this blank map as a pre-unit assessment tool to find out what students knew about the economic activities of different regions of Italy. (If you need to make a giant display, check out the wall art generator, Rasterbator and get your mind out of the gutter!) I then gave them free reign to use it how they pleased to document what they had learned. They chose to paint it and then you can see some students have added on information about landforms, "the industrial triangle," capitals of the regions, etc. When focusing on map skills, the students then asked if they could create a key for this map too (it's the white sheet at the top right). I was more than delighted!


P.S. If you want to see what we did for the summative assessment for this unit of inquiry, check out my post about that!

Next year, I'm going to continue to focus on this and give the students a lot more freedom to design their learning space.

Monday, 3 September 2018

Grade 4 PYP Classroom Reveal September 2018

It's finally classroom reveal time again. I was very excited to get cracking on getting my room ready. This year I will teach grade 4. Having been a grade 3 teacher for the last few years and moving to a new classroom, I was very motivated at the thought of creating a fresh space for my students and me. As I will have some of the same students as last year, I wanted to create a learning environment that looked a little different and more mature. As you'll see, I've kept some things that have worked well in the past and I have added in some new systems. Read below for more details!

I'll begin with my favourite. This is the popcorn display just outside the classroom door. On the first day of school, the students are going to write their goals for the year on popcorn-shaped paper. We're then going to analyse them - noting which attributes of the Learner Profile, transdisciplinary skills or PYP attitudes are connected to their goals.

And let's take a look inside the classroom. Here are some views of the whole room. Scroll down to read about specific sections of the room.
 You'll notice there is just a "Learner Profile" title on the door. The children will make the Learner Profile posters in the first week of school. To do so, I'm going to share a Google Slides presentation and they will all be collaborators, adding text, pictures, drawings, photos, etc. as they see fit. This will be used as an interactive display. I will cut out pictures of each student. When they feel that they/their peer has shown an attribute very well, they move the picture to the related attribute. We will regularly discuss who we have moved and what they have done. The skills posters are my own. On the narrow board, we have our class jobs. Each child's name is on a crayon template on a peg. 


As with other years, I will continue to use this polkadot behaviour management clip chart that I got for free from Under The Alphabet Tree (on the tall bulletin board). It has worked very well for me in the past. The purple and orange object hanging on the left of the photograph is my PYP Attitudes certificate, handmade by one of the children in my class last year (and again this year!).


I've displayed the PYP attitudes posters on the cupboard doors, along with our school's mission statement. If you look closely you can see that my "superglue" basket is still going strong! The "Vowels glue words together" poster and "Super Adjectives" word mat are from SparkleboxThese two boards at the back of the room will remain blank until for now. Then they will be filled with student work related to the first unit of inquiry. 

This year I decided to ditch the words "Wonder Wall" and have a "Burning Questions" area instead. I've also put the 8 PYP key concepts around it so that the children's questions can be sorted as they place them on the wall.

Next to the burning questions, we have a reflection area / "Wow work" wall. If you've seen my other classroom reveals, you'll see that I've used homemade Lego superheroes to hold up the essential agreements in the past. As I'm still not ready to part with them, I decided to use Hulk to hold up this title. How cool is the Hulkbusters font? I then hot-glued some Hulk fists to pegs so the kiddies can pin up their favourite work. They can then take the attitudes / Learner Profile attributes or skills from the plastic envelopes and pin on the ones they feel they developed while doing their chosen piece. I made the skills posters. I couldn't resist making the "Reflective" lettering actually reflective. Have a look at my blog post to see how I did it!


Behind you can see this lovely inquiry cycle graphic that I got from Mr. PYP. Then there is this Action board. I downloaded the action cycle posters from The Classroom Contessa. Underneath is a fantastic "What kind of action do I want to take?" poster from Jessica O'Hanley.


Above this is the main unit of inquiry board. I created this display pack last year and love it. I have all of the transdisciplinary themes, Learner Profile attributes, attitudes and key concepts printed and laminated so I can just switch them every time we start a new unit. 


At the front of the room, I made a more grown-up looking calendar in a grey and mint theme. I made a sheet for our birthdays using the same colour scheme. I'm very excited about the "Student of the Week" section. This year, I'll choose a student on Monday to be our Student of the Week. The other students will be encouraged to note instances where they demonstrate attributes of the Learner Profile. They can add this to the sheet. The sheet will be given to the student at the end of the week. As you can see, this sheet is put on with little pegs so it's easy to change weekly. Also on this display you'll see some reflection posters based on Marzano's Levels of Understanding. I just changed this one what I had previously to match the colour scheme and fit better.
I also put together those clock labels to help with reading digital and analogue time. I made them using these gorgeous free glitter digital papers from Jena Hudson at Sew Much Music.

On the other side is my personal teacher board. There I have these 3D cacti that I made over the summer. Read about how I made them in this blog post. You can also see my name card which I made with this Southpark Avatar Creator. I'm still in love with my Van Gogh "Starry Night" laptop case. It makes it so much easier to find my computer if we move around in staff meetings / collaborative planning sessions. 

In the green cup, you'll find these Ladybug & Chat Noir flipsticks. I use these to choose students at random. You simply flip them over and then you can easily see who you have not yet chosen. 

Like last year, I've displayed the PYP key concepts around the board. I got these fantastic keys for free from Ms. Murdoch. I have also attached my remote controls to the side of the board using adhesive velcro squares. 

I'm reusing the giant symbols and header of "Magic Maths Words" display. The students will add useful words to it as the year goes on to help with problem-solving e.g. multiplication words could be "multiply," "groups of," "by," "double," "times," etc. I got the title banner from Sparklebox, the symbols from Fun for Learning and the adhesive googly eyes from Flying Tiger.

If you've got this far, thank you for taking the time to have a look around our room!

Tuesday, 21 August 2018

PYP Class Essential Agreements / Mission Statement Displays

Creating classroom agreements or a class mission statement is a must-do in your first week with a new class. I've found the book, "If Everybody Did" by Jo Ann Stover a fantastic way to lead into discussion on what we should do in our own classroom. I've always worked with my whole class to create their agreements and split them into groups to illustrate them. Here are some of the ways I've displayed them over the years. Then I'll show you some inspiring examples I've happened upon online.

This Angry Birds display was from my first year teaching in a PYP school (clearly I did not yet know that the word "rules" is not used in PYP schools. Perhaps that should have read, "Our Golden Promises.") The children wrote and illustrated the agreements on giant eggs. Unfortunately I didn't get a photo of the finished display!

Next came these hanging owls. The children illustrated the agreements on their tummies. 


And I'm sure you'll recognise these Lego superheroes from my blog header. They've been used to hold up classroom agreements for the last few years. They were painstakingly and lovingly made so I couldn't part with them after only a year.

 Here they are hanging at the front of my classroom.


Lately I was really inspired by these class mission statements shared by Susan Powers' (author of the PYP Teaching Tools blog) on Instagram.


If you don't already follow Susan online, make sure you do so! She shares fantastic, thought-provoking posts about inquiry-based learning in the PYP.

This gorgeous Class Promise display was shared by Jennifer Jones.

I love how simple this one from Upper Grade are Awesome is! The key words really stand out in colour. Naturally in a PYP school, you would not use the word "rules." However, the process she and her class have carried out to make these agreements is perfectly PYP-friendly!


Monday, 6 August 2018

3D Cactus Art


Question. What do you do when you have too much bright green tissue paper lying around your house and you're trying to stop hoarding craft supplies and actually use them? Answer. You make 3D cacti, of course!


I was looking at some cute cactus clip art on Pinterest and thought they might be a cute way to brighten up my teacher bulletin board. I learned this technique from a children's art magazine when I was about 8. The resulting 3D fruit bowl stayed in my parents' kitchen for many years after. So why not take a trip down memory lane? Here's how I made them!


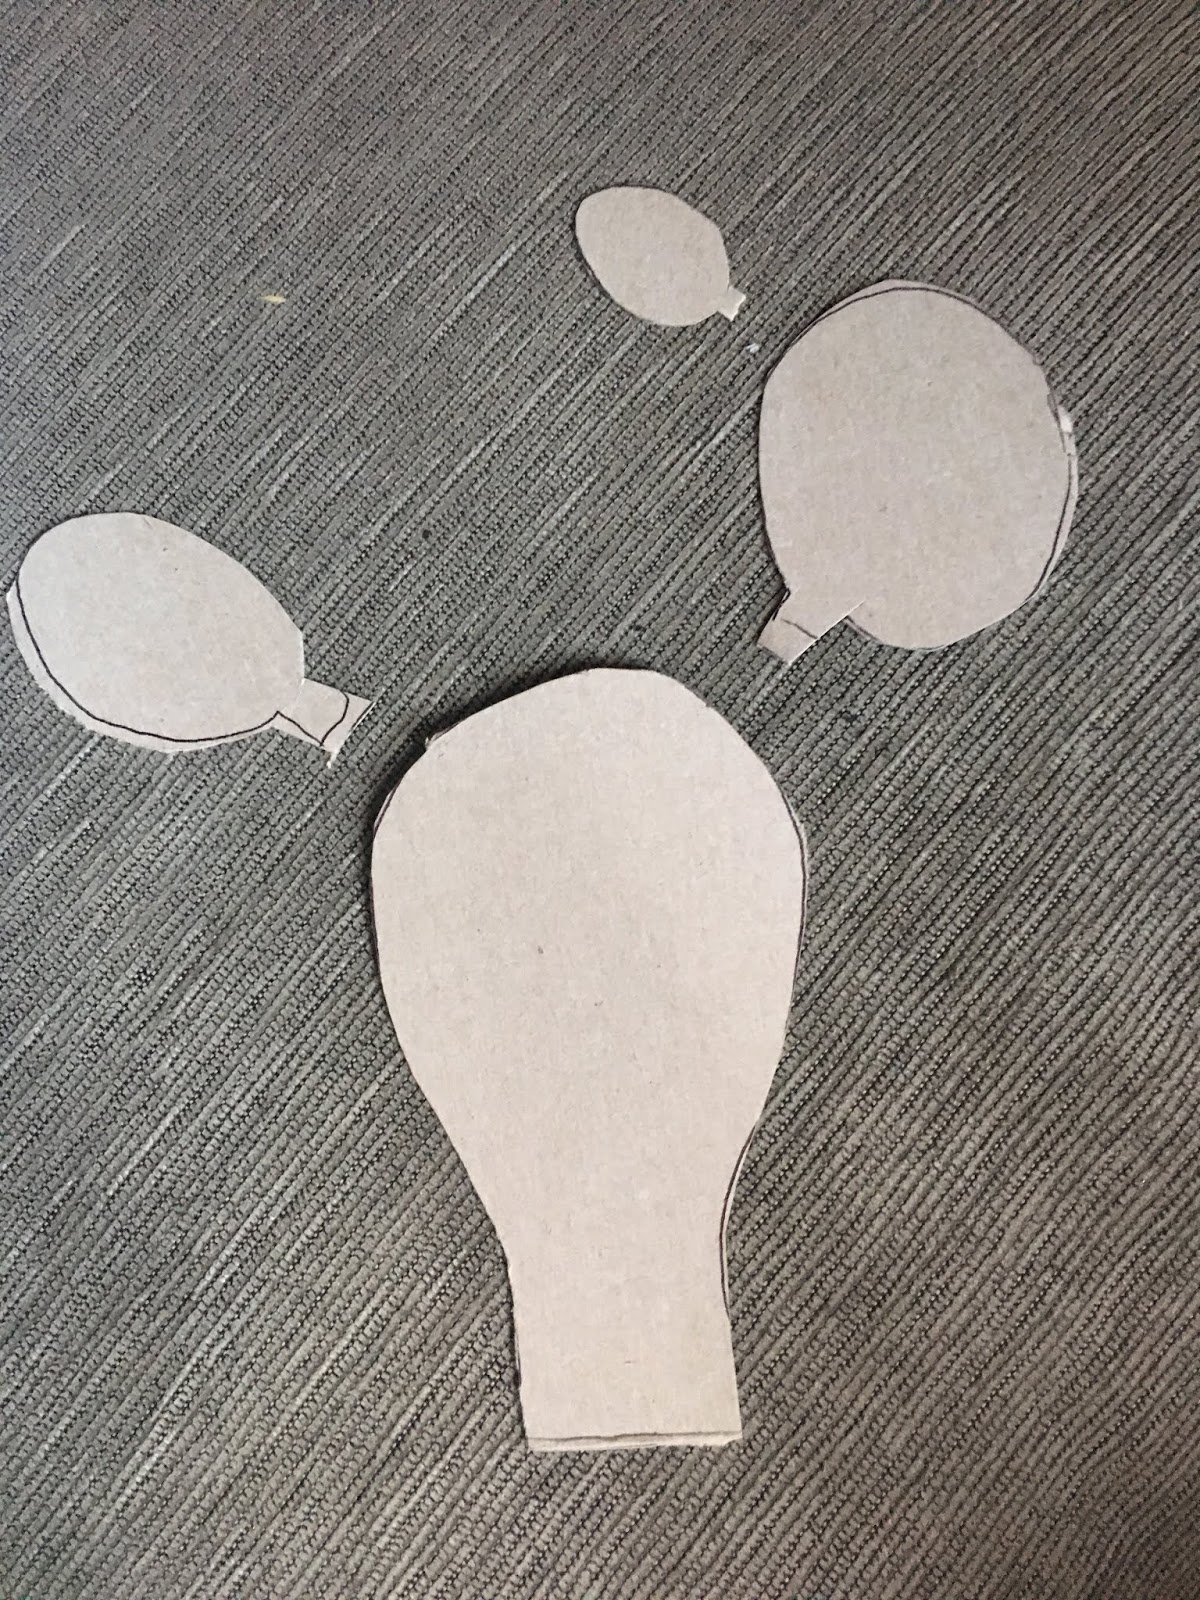
I drew the cactus shapes on card and cut them out. I then balled up cotton wool and taped it on top.


Next, I wrapped tissue paper over the top of each part and taped it at the back. I taped all of the pieces together and used strips of card to make it more sturdy.


I drew on eyes and a mouth and then added bead stickers and tissue paper pom-pom flowers. Here's a tutorial on how to make pom-pom flowers. Finally, I made some cardboard pots et voilà, they're done!