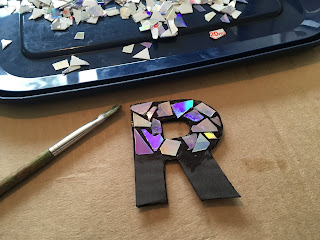
Resources needed: A computer and printer, paper, thick card, black marker, PVA glue, paintbrush, scissors, craft knife, old CDs/DVDs, boiling water, heatproof container, towel ...and a LOT of patience!
1. Soak some CDs/DVDs in boiling water for 10 minutes. This will soften them and make them easier to cut. I did two at a time so they didn't cool down too much.
2. Take the CDs out of the water and dry them off.
3. Cut the CDs into tiny shapes. I realised that these were much too big for my letters so I ended up cutting them much smaller.
You'll might also be able to pull apart the two layers. This makes cutting easier. I was able to snap some pieces. NOTE: Snapping is a bit risky - my eyes are lucky to have survived! :)
4. Print your lettering. I used the Franklin Gothic Heavy pre-installed font in PowerPoint (size 287). Glue the lettering to some thick card and cut it with a craft knife.
5. (Optional) Get a black permanent marker and colour the rough edges so you can't see the colour of the card.
6. Cover the letters with PVA glue, small sections at a time, and stick your CD pieces on with small spaces between them. When you're finished sticking on all of the pieces, add a layer of PVA glue over everything just to seal it all in properly. It will look cloudy at first but it will dry clear and your CD lettering will be nice and shiny!


No comments:
Post a Comment